
 |
| Matsya Avatar |
Dasara (Dusheera) festival is just a month more , During this festival , certain sections celebrate the dolls and arrange them very nice it will be a visual treat to see the various dolls arranged to match various themes , it could be mythological like Dashavatar, Ramayan & Mahabharath or it could be social like display of farming , festivals . In all these the dolls represent the rich heritage and culture of our country India. Today I am starting a new series of quilling dolls for Dasara with theme of Dashavatar .
Dashavatar refers to the ten avatars taken by Lord Vishnu to protect dharma and destroy the evil beings. Vishnu is the hindu god of preservation. Lord Vishnu is said to descend in different form of an avatar to restore cosmic order. These Avatars play a major role in shaping human evolution through centuries. There are ten avatars of Lord Vishnu which are referred as Dashavatar. They are :
- Matsya Avatar
- Kurma Avatar
- Varaha Avatar
- Narasimha Avatar
- Vamana Avatar
- Parashurama Avatar
- Rama Avatar
- Krishna Avatar
- Buddha Avatar
- Kalki Avatar
The first Avatar of Lord Vishnu is the Matsya Avatar. Here Lord Vishnu takes the form of gigantic Matsya ( fish ) to destroy the asura (demon) Hayagriva, who steals the four vedas from lord Brahma. To restore the vedas back and save Manu ,the Sapta rishis and living beings during the floods which destroyed the world . You can read more on this avatar here
In this article I am showing how to make the dashavatar dolls using quilling. The first in this series is the Matsya ( fish ) Avatar.
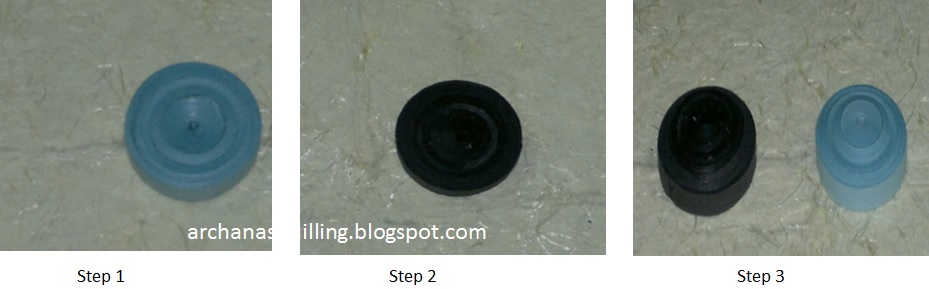
Face ( Step 1 to Step 3 ):
- I have used 5 mm quilling strips. For the front part of the face I have used 3 strips of blue color.
- Attach 3 quilling strips and make a tight coil. Slightly make a cone.
- For the back part of the face I have used black color . Make a tight coil using 3 strips.
- Attach these two parts and complete the face by drawing the eyes , nose and mouth.
Neck ( Step 4 ) :
Make a tight coil using two blue color 5 mm quilling strips.

Body ( Upper part Step 5 and 6 ):
For this I have used 10 mm quilling strips. Make a a tight coil using 4 quilling strips of purple color. make two such coils. Attach the one above the other.

Body ( Down part - Step 7 to Step 10 ) :
This will form the shape of a fish. For this you need to make two cones ( one small and one big ). I have used 5 mm quilling strips for this. For the top part attach 4 quilling strips of yellow color and make a tight coil. then make a small cone as shown.
For the down part attach 6 quilling strips of yellow color and make a tight coil. Make a big cone and stick it to the top part.

Scales ( Step 11 ) :
Cut a small paper strip ( 3 mm ) into small strips . Make a small U shapes and stick it on the body of the fish.

Tail ( Step 12 and 13 ) :
Take a single blue color quilling strip of 5 mm dimension. Make a half moon shape and stick it to the down part of the body. You need to make two such tails.


Crown ( Step 14 ) :
I have used 5 mm quilling strip. Make a tight coil using 3 gold color quilling strips. Form a cone shape and place it on the head of the lord. You can stick kundans to decorate the crown.

Hands ( Step 15 and 16 ) :
I have made four hands for the lord. The first two hands are made using 5 mm blue color single quilling strip. Make a semi circle , bend it a little and attach it to the body on two sides.
For the other two hands, I have used a single 5 mm quilling strip. Make a tight coil and form a small cone shape. I have placed a chakra (disc) and a shankha (conch shell) ( Step 17 and 18 ) on the two hands. Please refer to the picture. Attach these two hands behind the previous hands.

The complete doll looks like this:


Once your quilling doll is ready , you can decorate the idol by putting a bead chain to the neck of the God. You can also stick kundan in the middle . Arrange the dasara dolls during the navarathri festival. It will look very beautiful. I hope you liked my creativity of making this doll. Please share your views on this. Please watch this space for more in the Dashavatar series.
Click below to go to any avatars :
Click below to go to any avatars :


